Scientific Computing in VS Code
I used to do all scientific computing work on Jupyter notebooks. My most common way of debugging was print, which is definitely not the best way to do so. Things got complex when I sometimes had to debug other packages installed in the Python environment. The debug mode provided in Jupyter is not very convenient. But I do like the freedom of running cells in Jupyter, which is important for testing new algorithms, so I don’t want to move my workflow to other IDEs like Pycharm.
My final choice is VS Code with its gorgeous Python extensions.
Virtual Environment
Python has a gorgeous ecosystem of libraries and packages. Virtual environments allow user to specify which versions of dependencies and even versions of Python interpreters. Environments also provide isolation between projectes which is important for solving conficting dependencies.
I am using Conda as my environment management tool due to its ease of use. Specifically, I choose Miniconda which only includes essential components, allowing me to customize my environments from the ground up.
In arch linux, Miniconda is included in AUR, so just install it.
yay -S miniconda3
After the installation, it would prompt you to add conda to your terminal:
conda init zsh
This command would automatically initiate conda for zsh shell (writing things into .zshrc in your home directory).
You may want to change conda mirros before creating any environments in China. See conda mirror help for more information.
Create Virtual Environments
conda create -n test python=3.10
This command creates a virtual environment named ml with python 3.10 installed.
Activate/Deactivate Virtual Environments
The default virtual environment is “base”. Change to our “test” environment is quite simple:
conda activate test
Or deactivate it:
conda deactivate
List All Environments
conda env list
Pretty easy, hah.
Package Management
Although conda is able to handle both package and environment management. I prefer to use pip to install necessary packages. pip is included in any conda environment.
Again, change pip mirros before install any packages in China. See pip mirror help for more information.
Install Basic Scientific Packages
pip install numpy scipy pandas scikit-learn
Install Basic Visualizaiton Packages
pip install matplotlib seaborn pyqt5
Here I choose PyQt as the backend of matplotlib.
Install JupyterLab
pip install jupyterlab
The following commands generate Jupyer server configuration files and set a password, so you can customize it yourself. The configuration files are in the .jupyter folder in your home directory.
jupyter server --generate-config
jupyter server password
We can start our scientific coding with Jupyter Lab, but I would recommend VS Code for a more comfortable coding experience. Now, let’s just start a Jupyter server without taking you to the default browser page:
jupyter lab ---no-browser
then we would go back into the VS Code configuration.
VS Code
VS Code is developed by Microsoft. It is a lightweight but powerful code editor which has a rich ecosystem of extensions for nearly every lanaguage.
Here I install the binary release from AUR:
yay -S visual-studio-code-bin
Basic Extensions
After starting the VS Code, install Python and Jupyter extensions from the extension market. And this pretty much sets everything up for Python development automatically.
Python Formatting
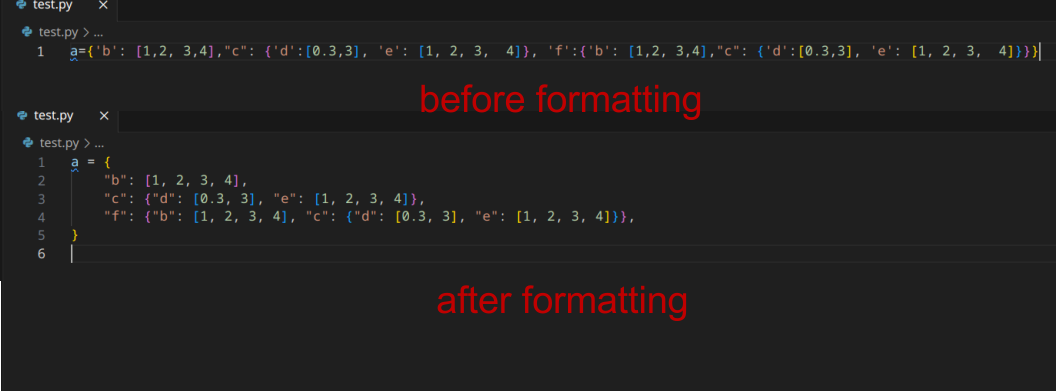
A formatter makes your code look clean and readable. In any Python file, hit Ctrl+Shift+P and type format, select Format Document With and hit Python. If you don’t have a formatter installed, VS Code would pop up a window to sugget you install a formatter. I personally choose black formatter.
Install Black Formatter extension. In settings, search Format On Save and put this on. Then you will be able to format each document automatically every time you hit save it. Below is a picture of how black formatter format your code.
Python Intellisense
The default Python intellisense should work out of the box. If not, go to the Settings and search for python.languageserver, change the python language server from default to Pylance or Jedi. Then restart the VS Code. If this still not work, perhaps you need to disable all extensions, restart the VS Code and enable all extensions again.
Python Debugging
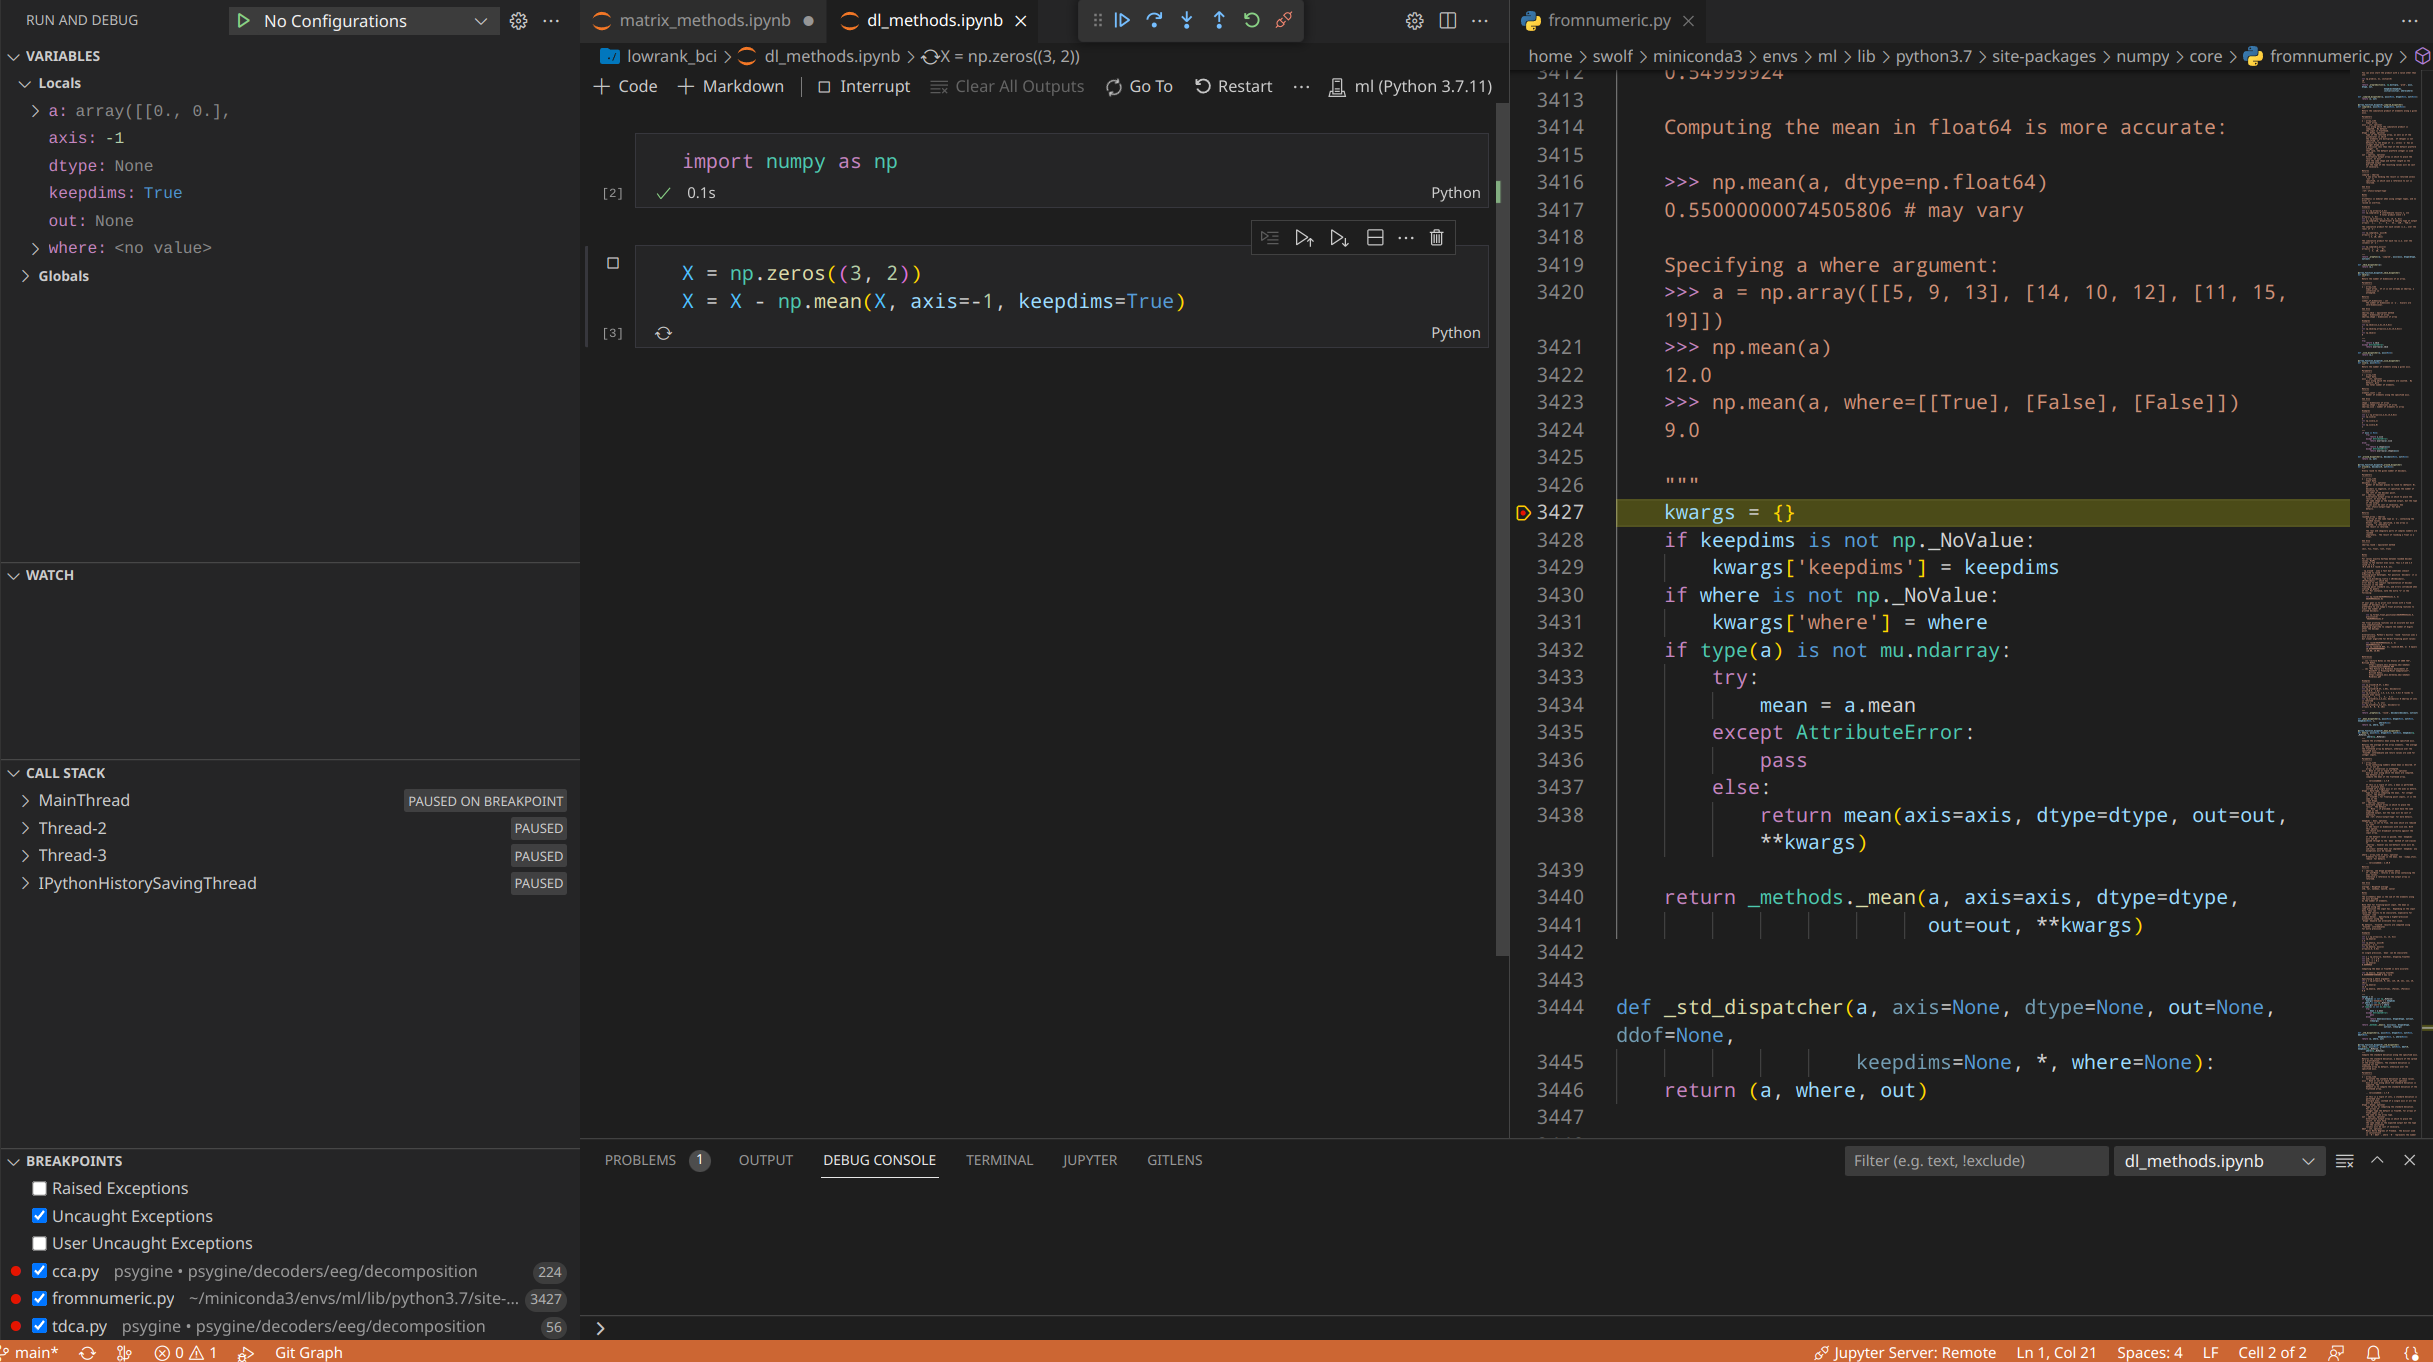
The default Jupyter debug only steps through user-written code. To debug library code, open Settings by Ctrl+, and search justmycode, uncheck the option and restart the VS Code.
Run Jupyter Notebook in VS Code
There are many ways to create a Jupyer notebook in VS Code (shortcuts, commands, etc). The most easy way is to create a new file named xxx.ipynb and you can directly open it in the VS Code.
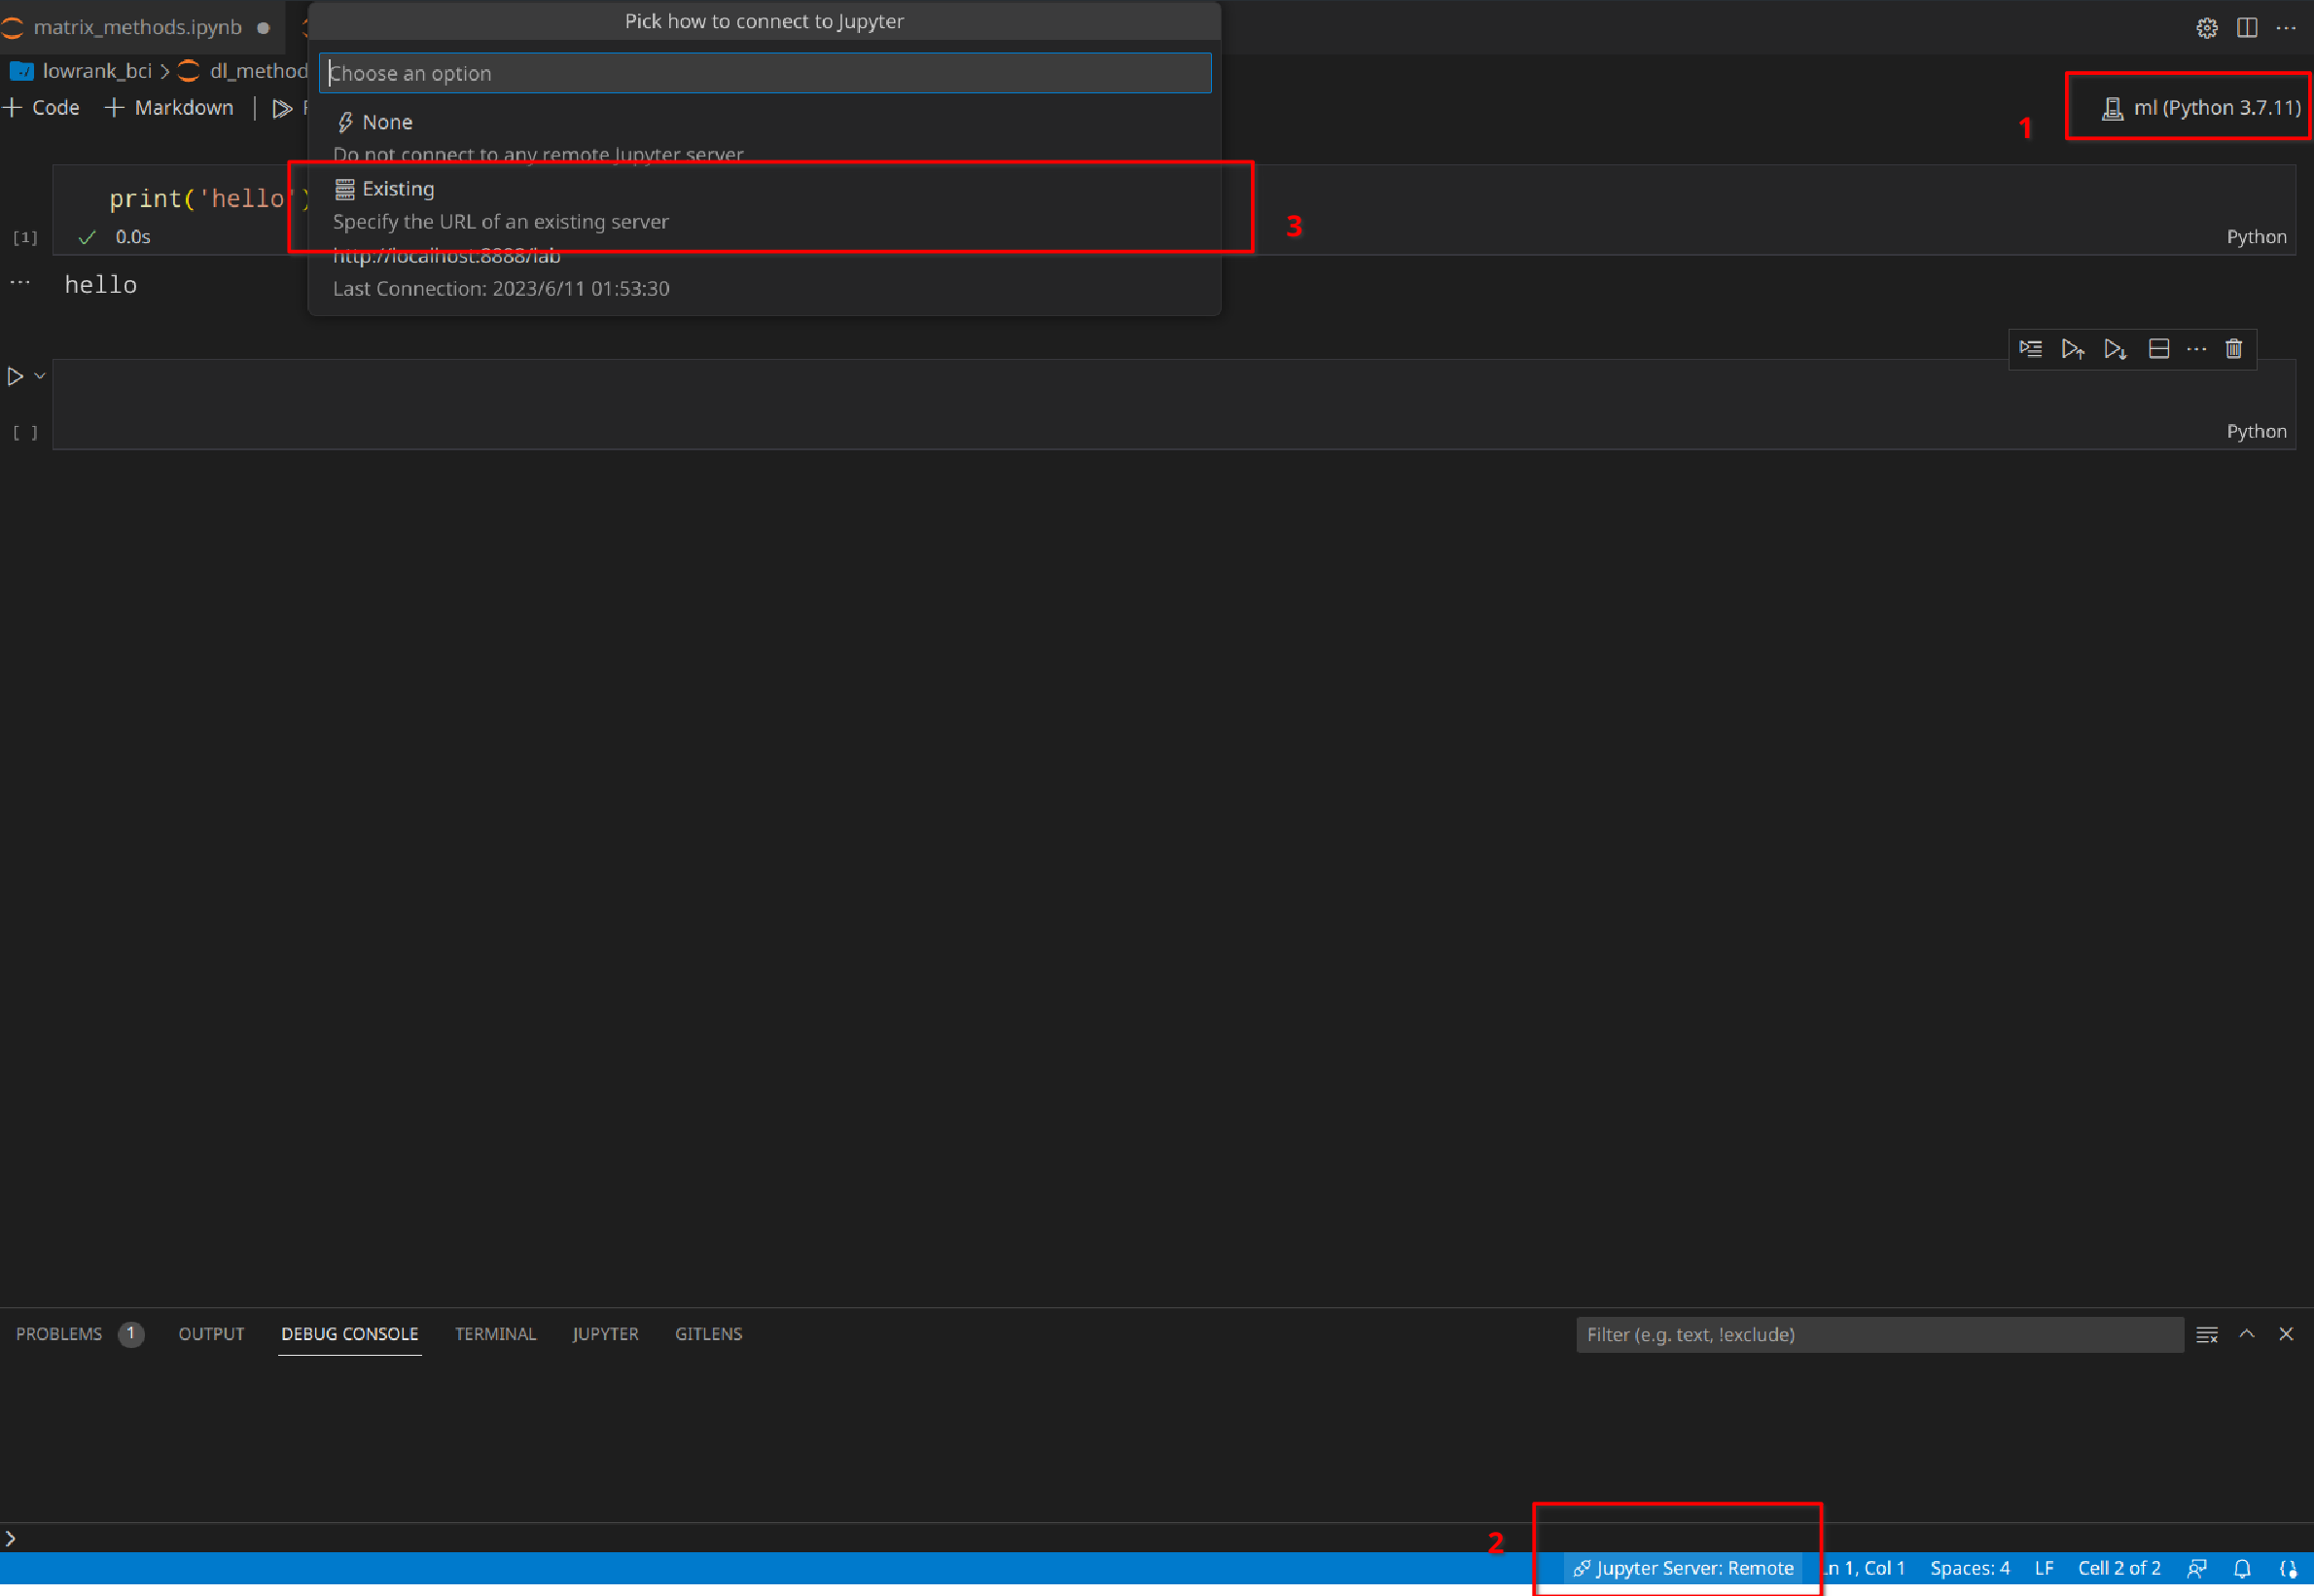
The first thing is to make sure you select the right Python kernel or environment to run the notebook. You may have multiple choices. Then toggle the Jupyter server selection menu and select Existing server. You will be prompt to enter your Jupyter password.

Running cells in VS Code is almost the same as in the Jupyter browser app. Triggering debug mode requires clicking the debug cell button alongside each cell. Just like MATLAB, you can set multiple breakpoints and watch how variables change with the program.
Docker for Deep Learning
Docker allows you to package applications and their dependencies into isolated containers. One good reason for using Docker is that official PyTorch releases usually depend on older CUDA and cuDNN versions, whereas Arch-based distributions typically have the latest NVIDIA driver. This may cause unexpected failures during installation. For example, my CUDA version is 12.2 whereas the official suggested CUDA version of PyTorch is 11.8.
You can use Docker to create a container with a different version of NVIDIA CUDA than what you have installed locally on your machine. Docker containers are designed to be isolated environments that can run software with specific dependencies, regardless of what is installed on the host system.
Install Docker
Install docker engine on Arch with these commands:
sudo pacman -S docker docker-compose
sudo systemctl enable docker.service
sudo systemctl start docker.service
After that, add the current user to docker group:
sudo groupadd docker
sudo usermod -aG docker $USER
Log out and log in to verify successful installation by:
docker run hello-world
If everything works, it would pull a small image and print hello world.
My home directory is quite empty so I want to change docker default images location to my home directory:
sudo systemctl stop docker.service
sudo cp -r /var/lib/docker /home/swolf/docker
Configure data-root in /etc/docker/daemon.json:
{
     "data-root": "/home/swolf/docker"
}
Restart docker.service to apply these changes.
Perhaps you may need docker-compose:
sudo pacman -S docker-compose
Install NVIDIA Container Toolkit
This is the most tricky part and I can not ensure my installation steps works for you. First, install NVIDIA Container Toolkit from AUR:
yay -S nvidia-container-toolkit
After that, restart docker.service and type:
docker run --gpus all nvidia/cuda:11.8.0-runtime-ubuntu22.04 nvidia-smi
and hopefully you can get the same output as of running nvidia-smi on the host machine.
Be aware of the maximum supported CUDA version for your host NVIDIA driver, check this list.
Build A Docker Image for DL
NVIDIA has pre-build PyTorch images combined with CUDA, CUDNN, etc. Check the release note to see if your requirements have been satisfied already.
I am building my deep learning image based on anibali’s PyTorch image. Here is my Dockerfile:
FROM anibali/pytorch:2.0.1-cuda11.8

RUN pip install --upgrade pip
RUN pip config set global.index-url https://pypi.tuna.tsinghua.edu.cn/simple
RUN pip install --no-cache-dir numpy scipy pandas scikit-learn
RUN pip install --no-cache-dir matplotlib seaborn pyqt5
RUN pip install --no-cache-dir jupyterlab

RUN jupyter server --generate-config

WORKDIR /home/user/MyProjects

EXPOSE 8889

# Start Jupyter
CMD ["jupyter", "lab", "--ip=0.0.0.0", "--port=8889", "--no-browser", "--autoreload", "--IdentityProvider.token=''", "--PasswordIdentityProvider.hashed_password=''"]
This Dockerfile would build an image making Jupyter available to external users. I personally change the default port to 8889 for compatibility with local Jupyter servers. And my docker-compose.yml file looks like this:
version: '3'
services:
  my_dl:
    build:
      context: .
      dockerfile: Dockerfile
    container_name: dl
    ports:
      - "8889:8889"
    volumes:
      - /home/swolf/MyProjects/:/home/user/MyProjects/
    stdin_open: true # Enable stdin for interaction
    tty: true # Allocate a pseudo-TTY
    deploy:
      resources:
        reservations:
          devices:
            - driver: nvidia
              count: all
              capabilities: [ gpu ]
So all my stuffs in /home/swolf/MyProjects/ would be a persistent volume to the docker container. Building the image is also simple:
docker-compose build
To start docker container, use this command:
docker-compose up
and stop the container after coding:
docker-compose down
Connect to Jupyter in Container
After starting the container above, open your browser and type the URL http://127.0.0.1:8889/. Then you can access any resources inside the container from the browser app.
Connect to Container in VS Code
Of course you could open any file in /home/swolf/MyProjects/ with VS Code, but it can not parse packages installed in the container so Go to definitions or something else may not works well. We actually want to “open” the IDE inside the container. For this, two extensions are needed: Docker and Dev Containers.
After that, there would be a small button on the left bottom corner named Open a Remote Window. Press the button and it would pop up a selection menu prompting you to select the way how to connect to a container.
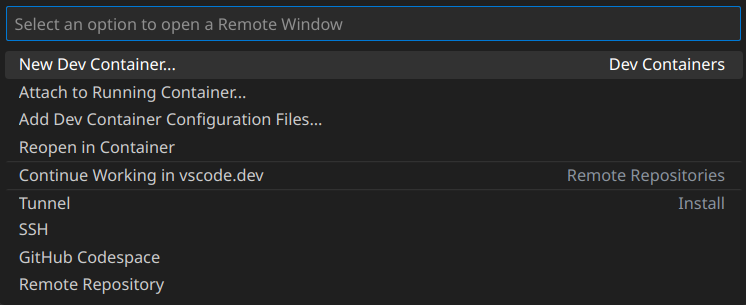
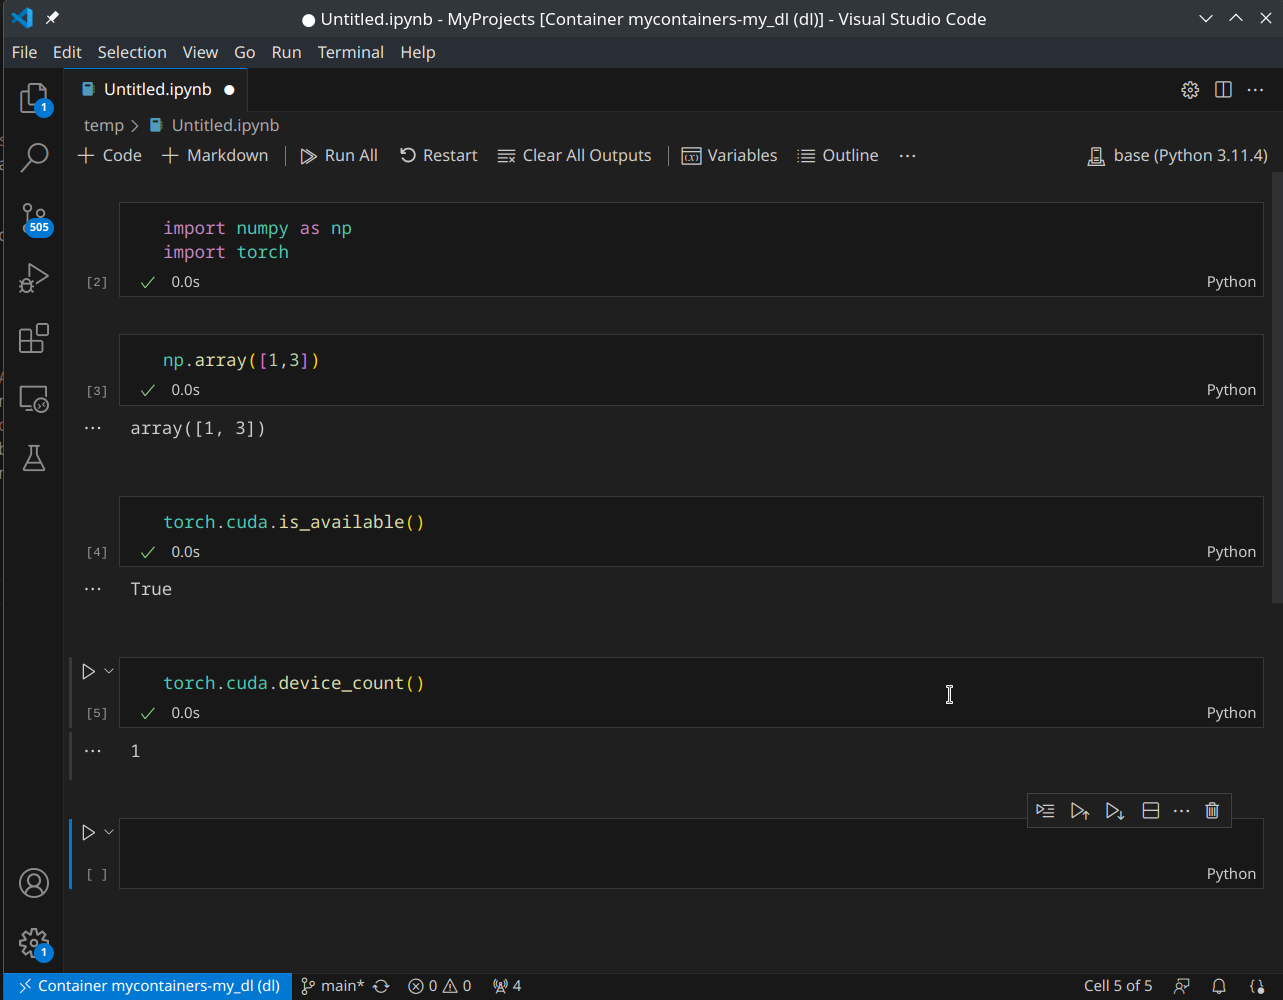
Since we have started our deep learning container, we choose Attach to Running Container. VS Code would open a new window, connecting to the running container with a few necessary extensions installed automatically. You may need install Python and Jupyter extensions inside the container from the extension market. Then you will be able to perform all deep learning tasks just as you would in a local development environment.
